By Willie Sandry
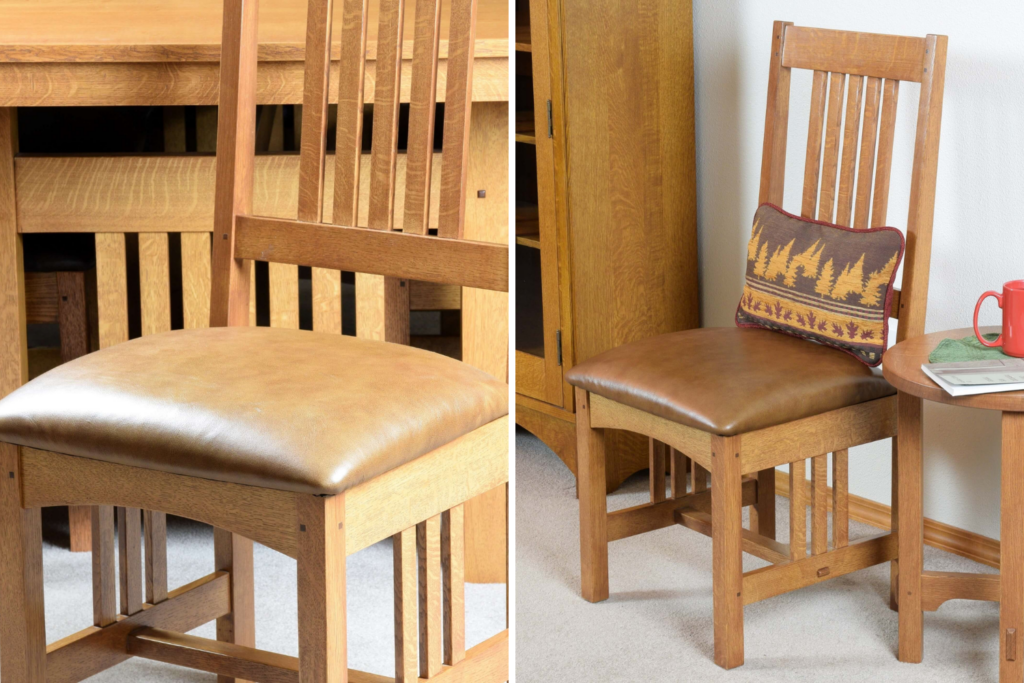
Reupholstering a dining room chair is a great DIY project. If you have a few basic tools and a desire to learn, a slip seat is an approachable project for even a novice. Never tackled an upholstery project before? Never worked with leather? No problem! These simple steps will guide you through the process, and I’ll even wager you find success on your very first project.
First and foremost, decide on the type of slip seat you want to make. Some dining chair cushions are tall with lots of padding, and others have a slim profile. Some have sewn or folded corners, while others have a stretched cover for a clean look, without pleats. The method shown here is for reupholstering dining room chair slip seats with about 2” of foam padding. There are no seams to sew with this technique, and the result is a tight, trim seat cushion without pleats. This method will work fine if your seat rests on top of the chair frame, but it works equally well if the slip seat drops into a recess in the chair frame. If you need to fit the cushion inside a frame recess, make sure the seat frame is about 3/8” smaller than the opening in all directions. The example we’re working on today sits on top of the chair frame, so size is less critical.
-
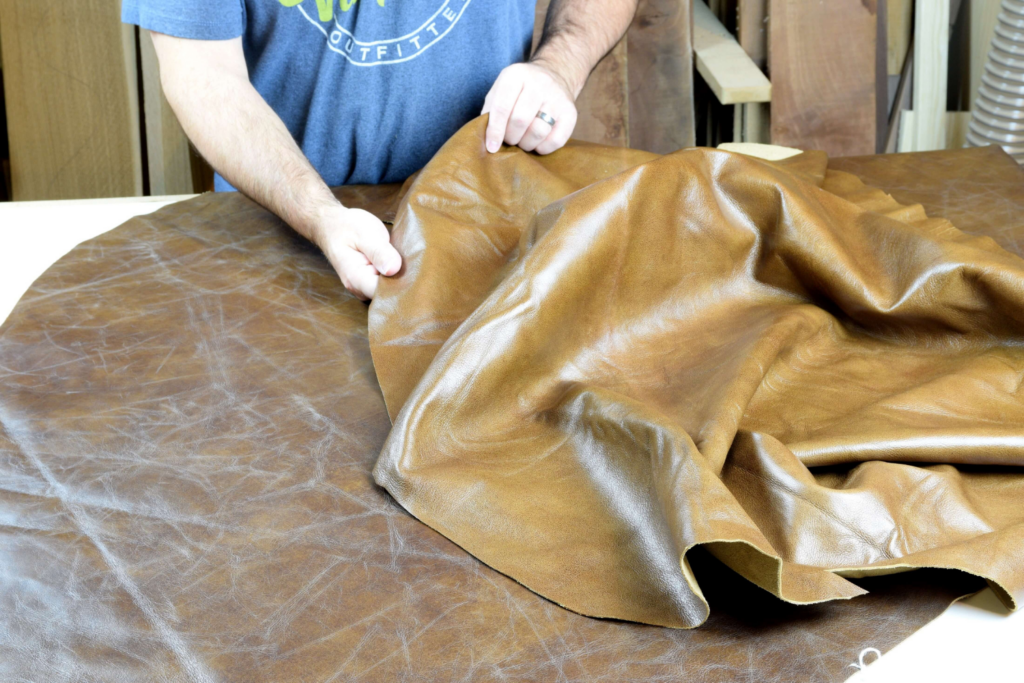
- Get Your Hands on Some Leather. Pick a nice piece of leather to re-cover your chair. If you’re only doing 1-2 chairs, a remnant might work. If you plan to upholster a set of 6 dining chairs, you’ll need a full hide.
-
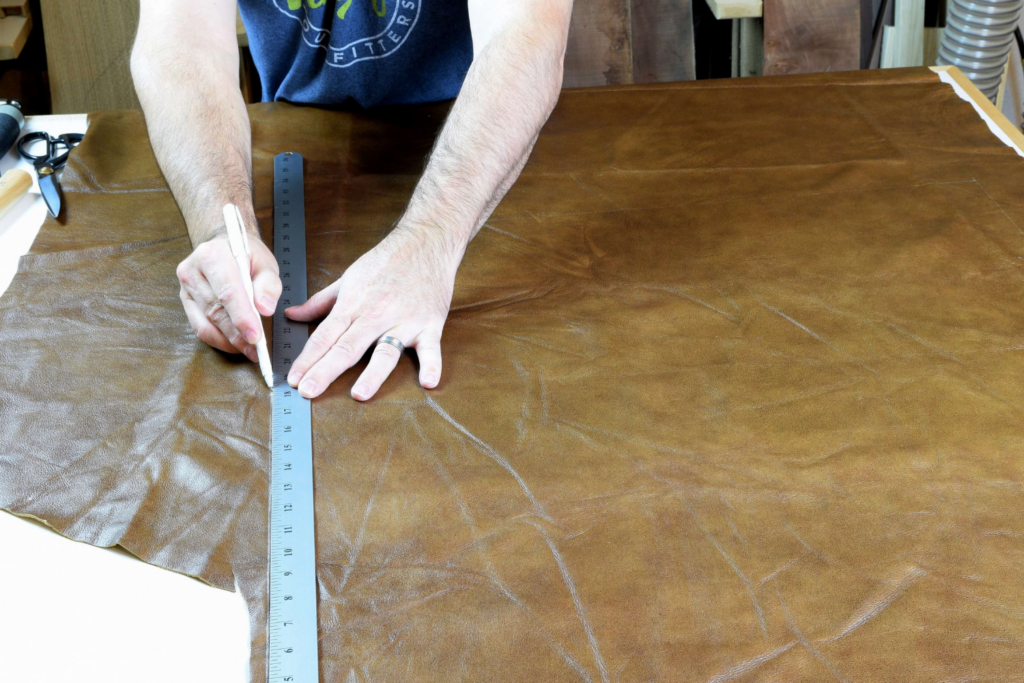
- Layout an Oversized Square. Measure the padded seat frame to get a rough idea of the leather size you’ll need. Leave about 3” extra on all sides.
-
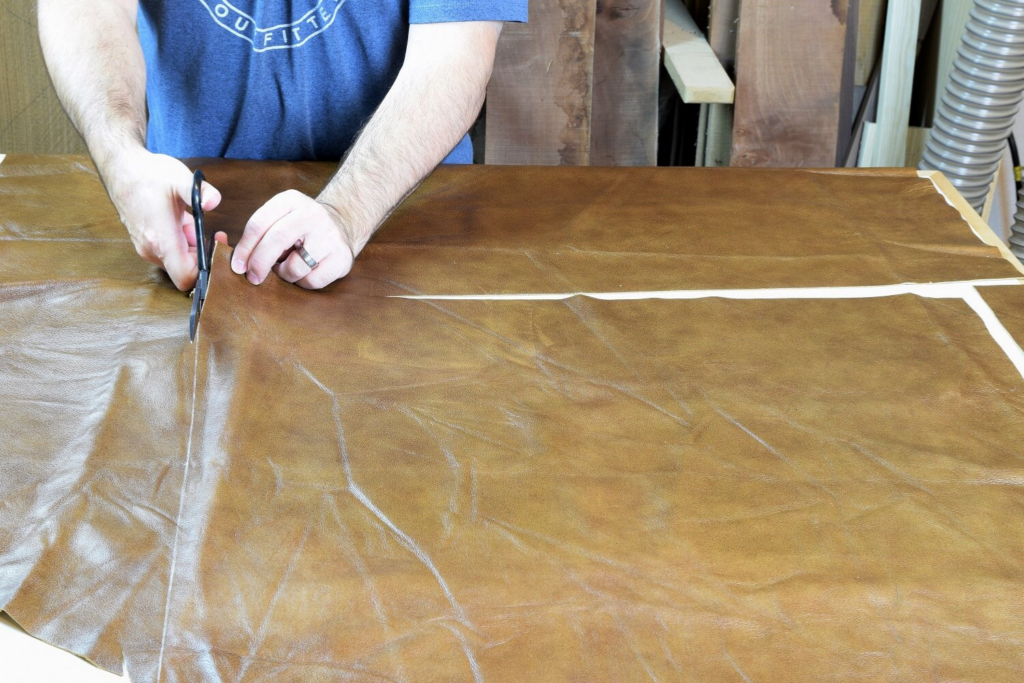
- Cut Out the Leather Panel. The leather was sized about 26” square in this case. This leaves a few inches on each side to manipulate the finish cover as it’s installed.
-

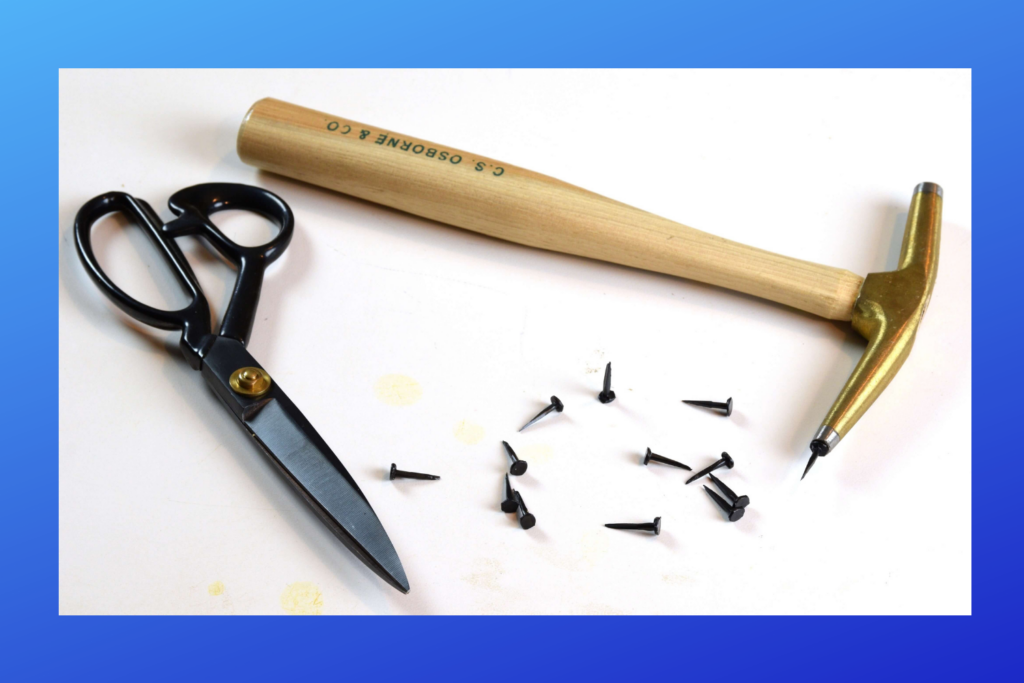
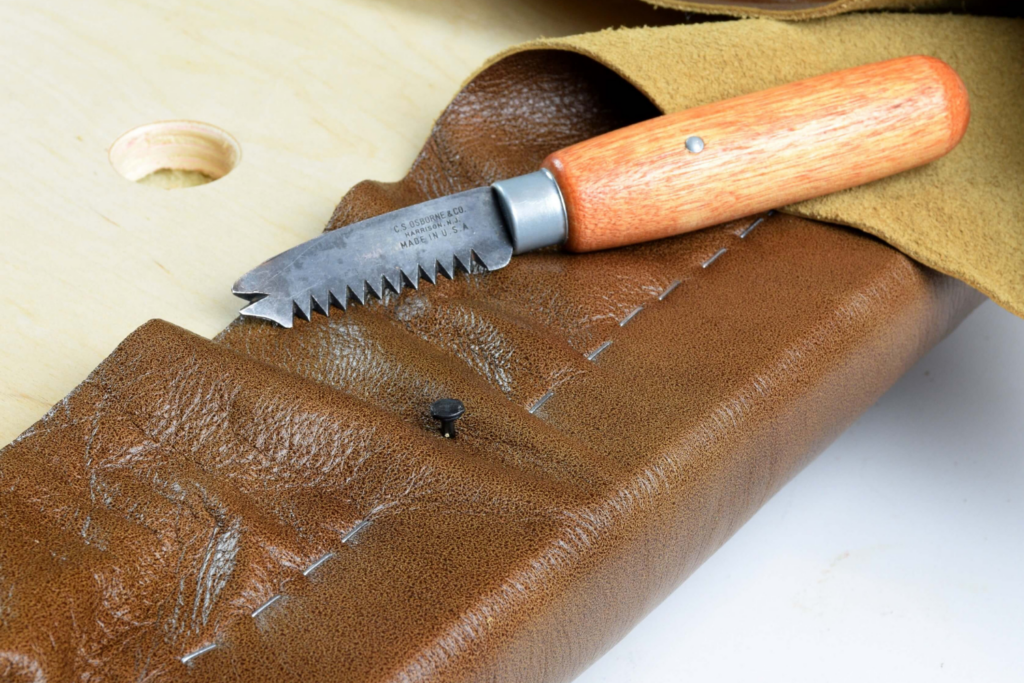
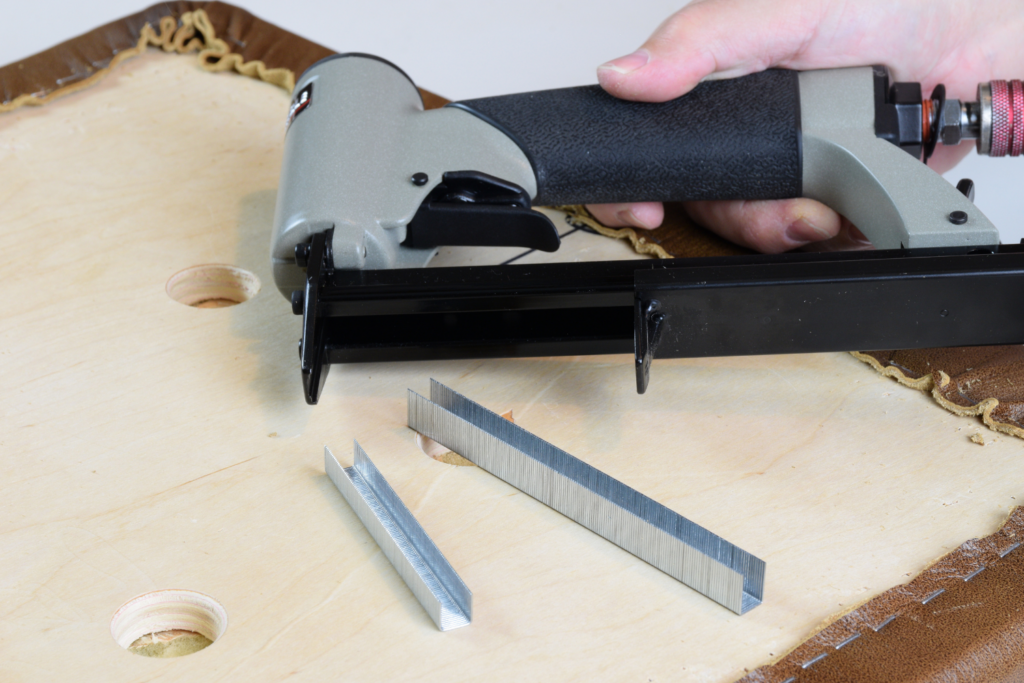
- Invest in a Few Good Tools. Luckily you won’t need many tools for a project like this, but you do need a few key items to get started. A magnetic tack hammer and a pair of leather shears are on the short list of tools to purchase. Even if you only use them a few times, they’ll quickly pay for themselves.
-
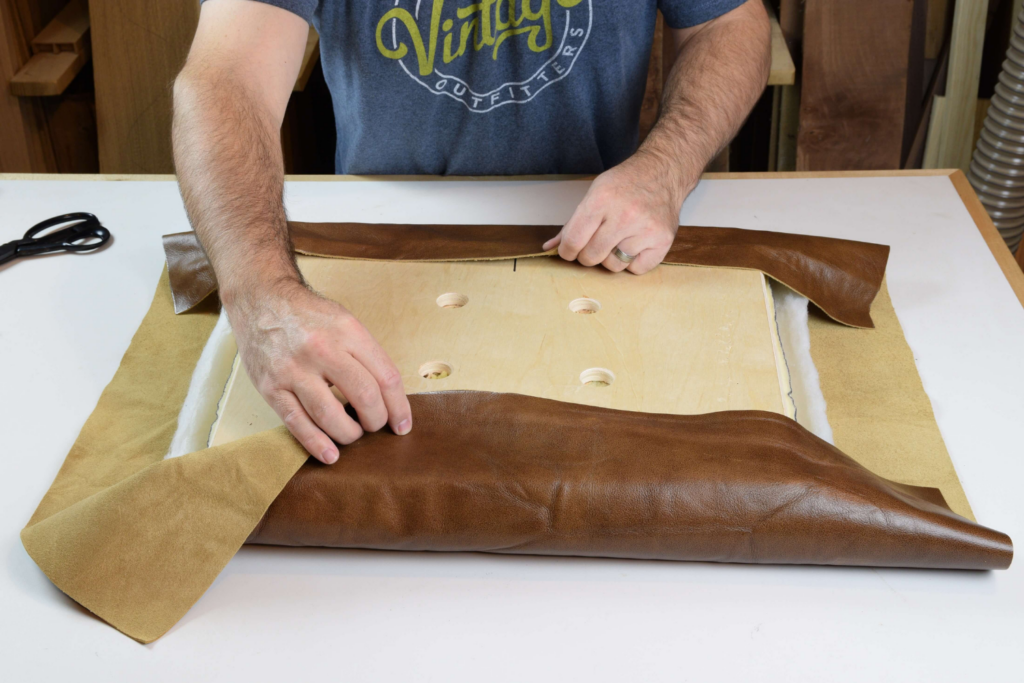
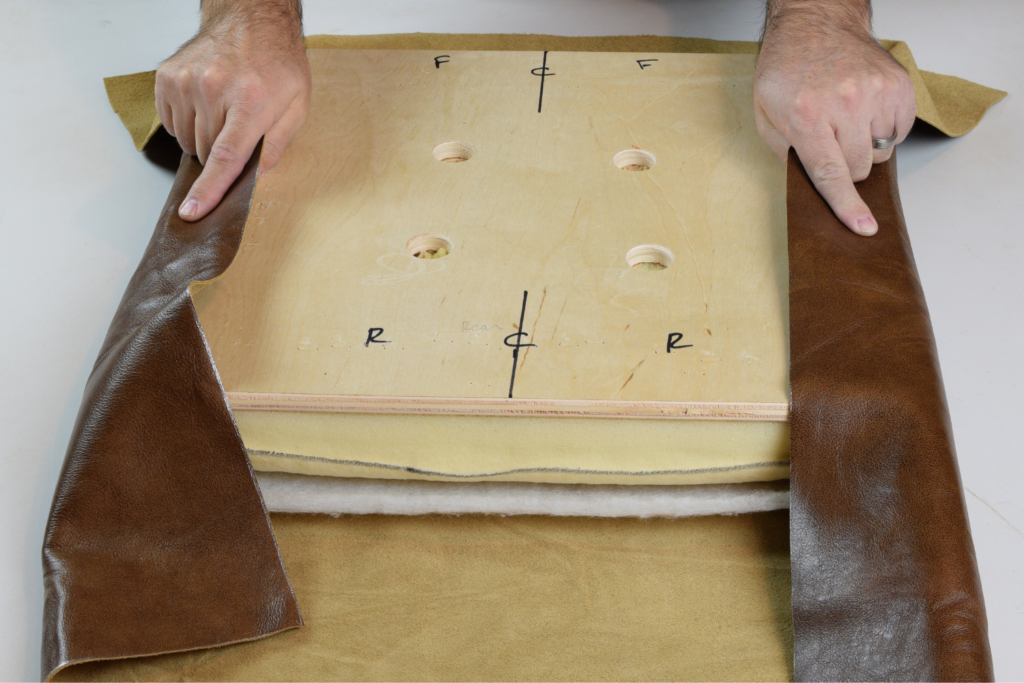
- Oversized Leather Panel for Easy Handling. Position the leather panel under the padded seat frame, making sure you have about 3” to spare on each edge. Note the vent holes in the plywood base, which are required for leather cushions.
-
- Mark the Front and Rear. Get in the habit of labeling the front and rear of the seat, as well as a center mark. On stretched covers it’s not critical, but when making sewn covers, center marks will be helpful.
Padding Requirements. Most dining chairs or slim-profile slip seats will have 2” of foam padding and a layer of polyester batting on top. If your cushion has 3” or more of foam padding, consider a sewn cover instead. The foam padding can be about ½” wider than the wood base in all directions. The batting should be large enough to cover the edge of the wood as it’s installed. This prevents damage to the leather over time.
-
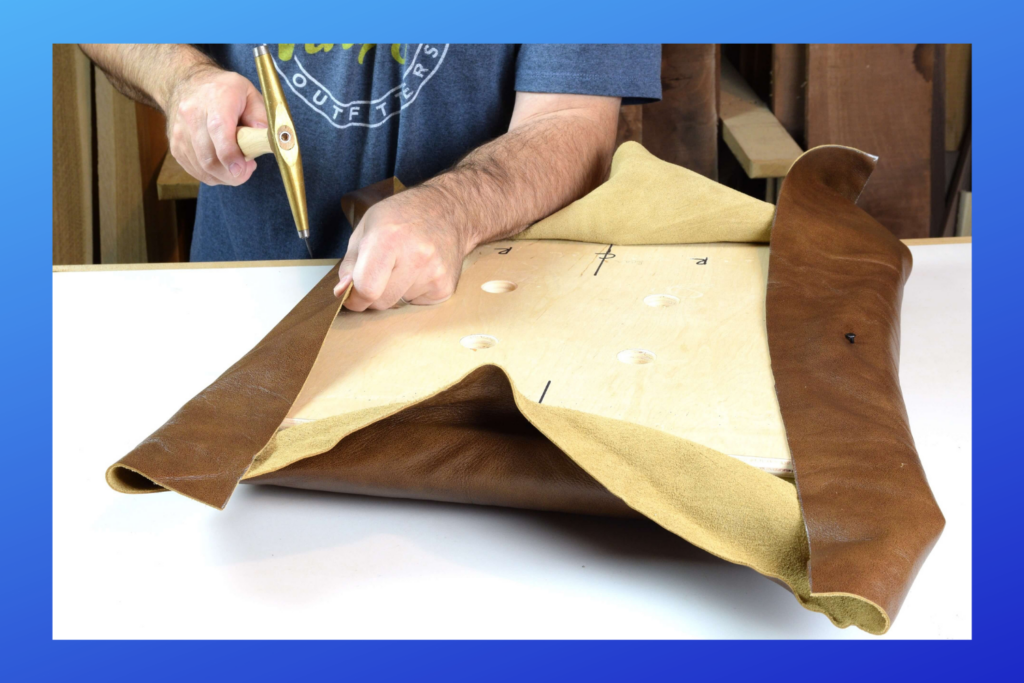
- Temporary Tacks. With your magnetic tack hammer, install a temporary tack at the middle front position. Stretch the leather taut, and add another tack at the back of the cushion.

-
- Cardinal Directions. Many times in upholstery the first step is to tack in four spots, like the directions on a compass. Continue with a single temporary tack on each side, pulling the slack out as you work.
-
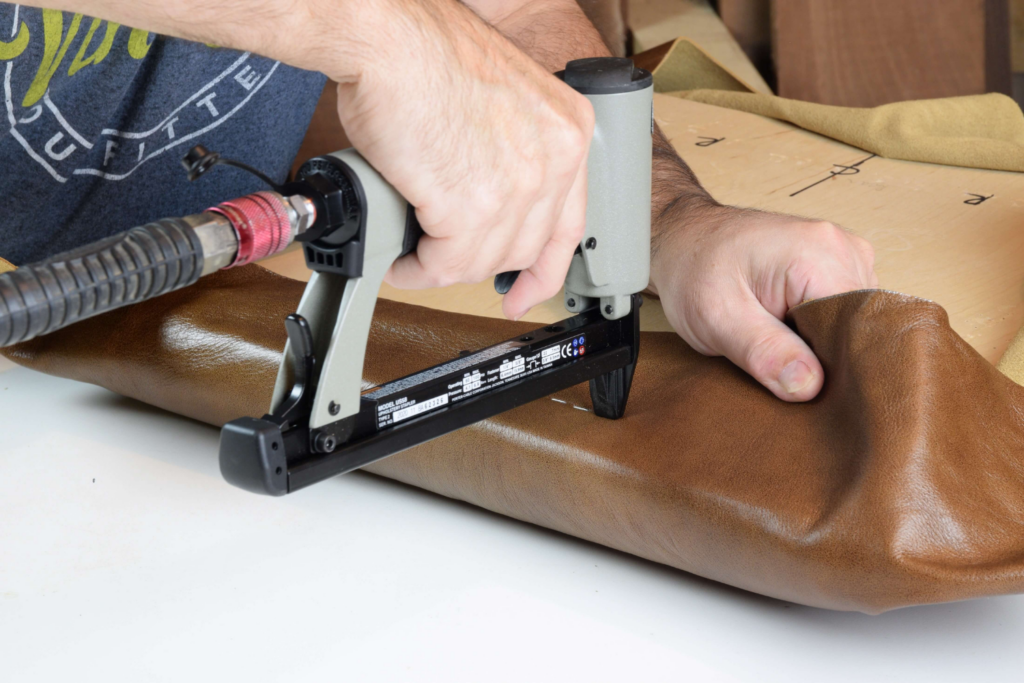
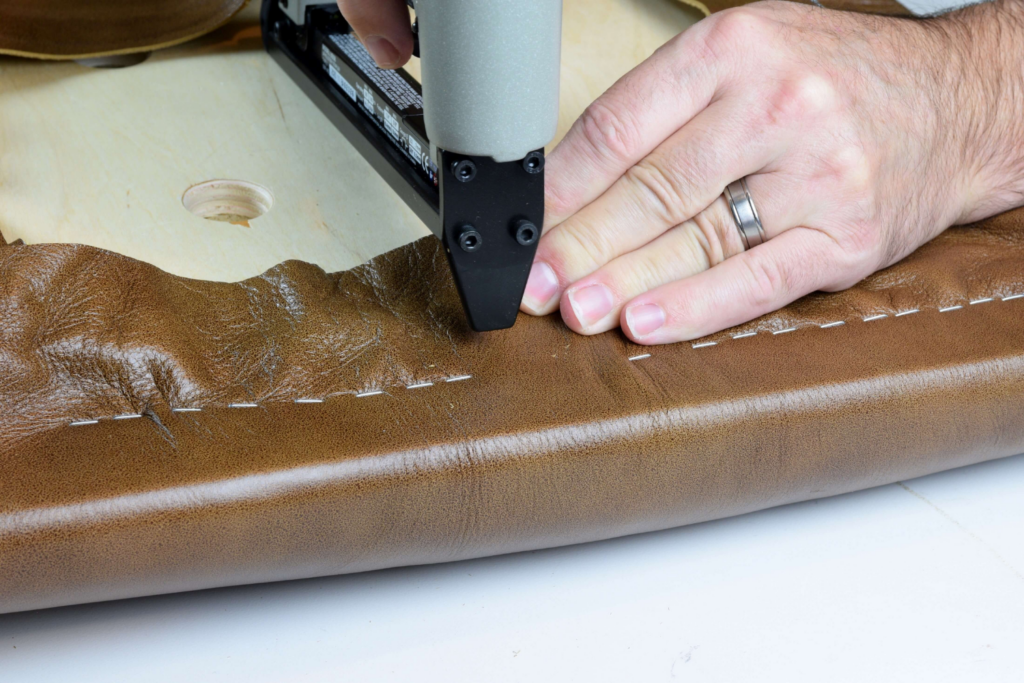
- Start at the Front. Staple the cover in place, working from the temporary tack at the front, towards one corner. Stop stapling several inches from the corner. Next, work toward the other front corner. Repeat the stapling at the back, then sides of the cushion.
-
- Pull the Temporary Tack. Once staples are placed toward each corner, it’s okay to remove the temporary tack. I use an upholsterer’s tack puller, but the hardware variety tool will work just fine.
-
- Replace the Tack with Staples. Stretch the leather back where the tack had been, and permanently attach this center section with staples.
-
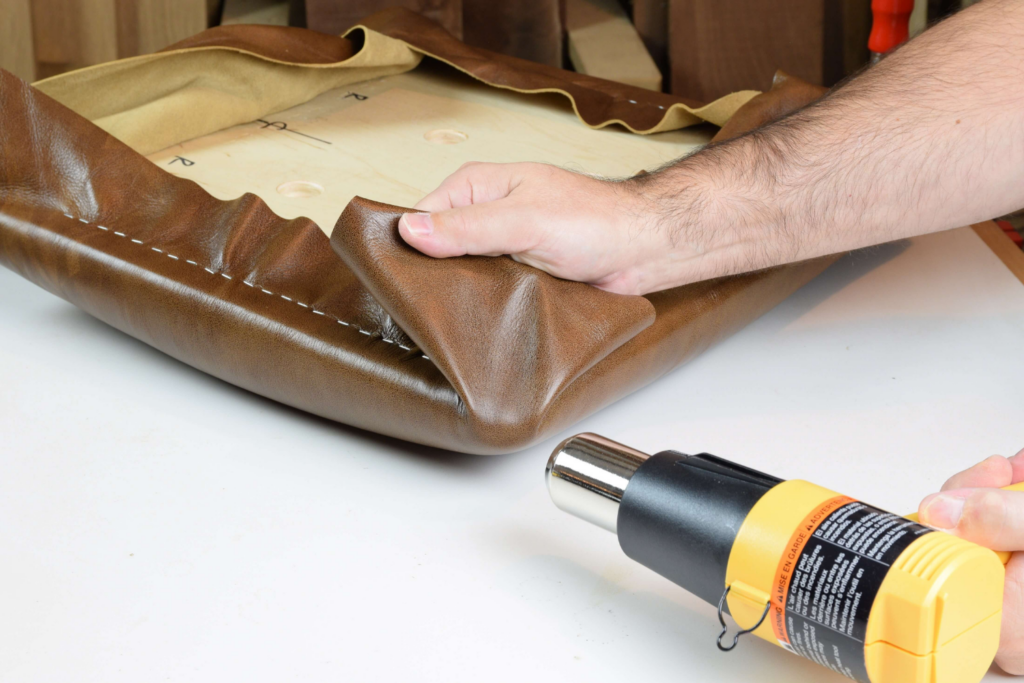
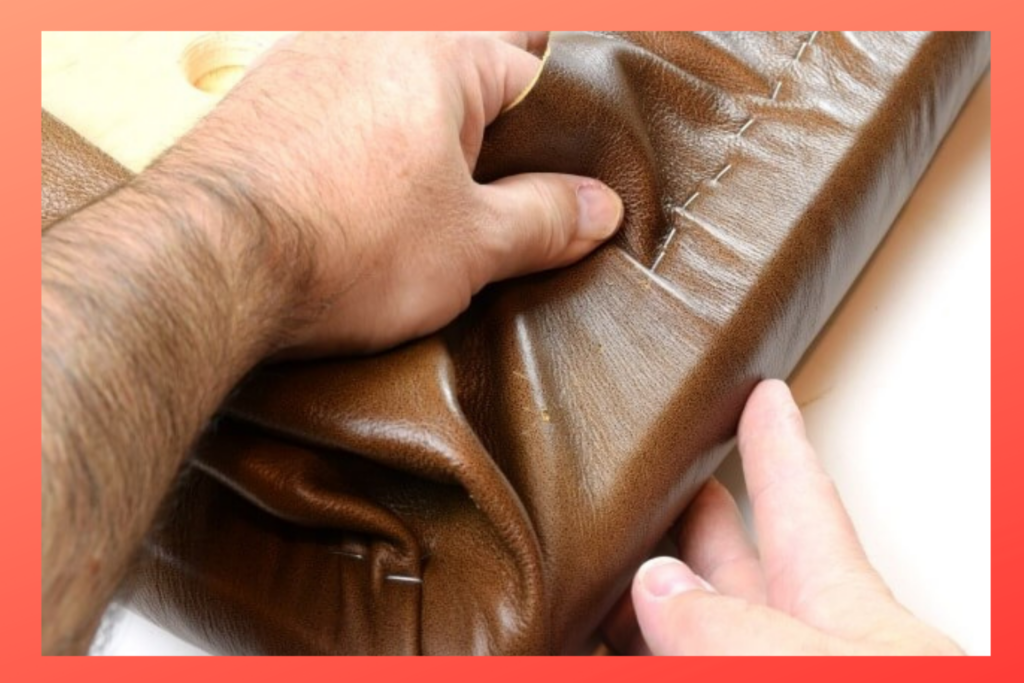
- Now Comes the Fun Part. Use a heat gun to soften the leather at the corners. If you don’t have a heat gun, a hairdryer set on high will work fine.
-
- Pull the Dog Ear. Pull the excess material diagonally back from the corner, and set one or two staples. This step requires a firm pull, and you should start to see the wrinkles move toward the underside of the seat.

-
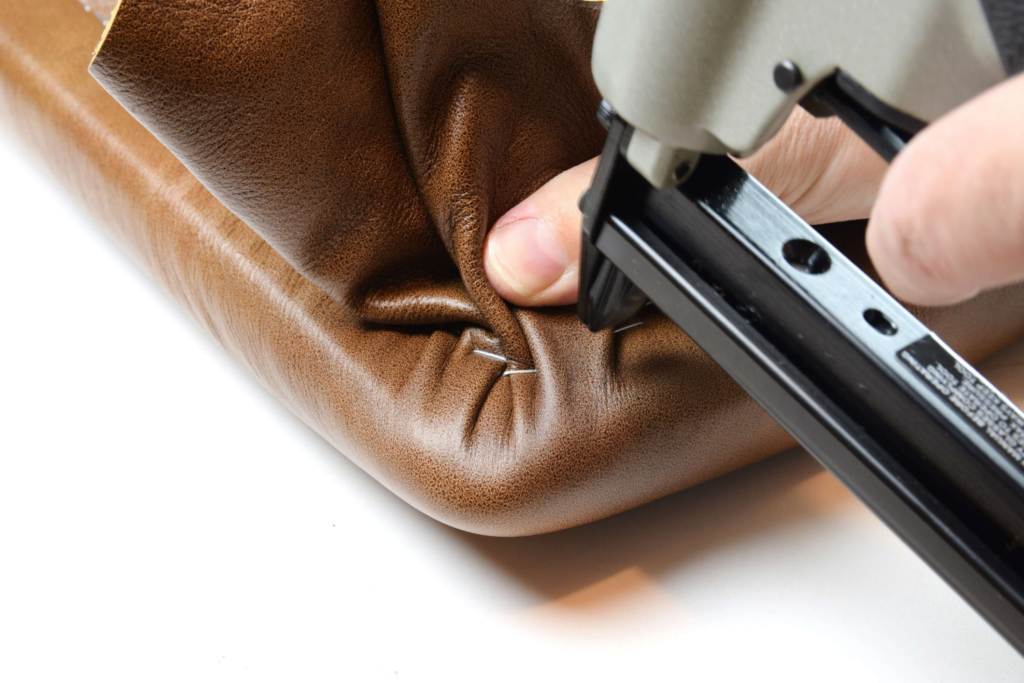
- Work Both Sides of the Corner. Create pleats to gather the excess leather, adding a new staple with each pleat. The goal is always to pull the wrinkles underneath, where they will be hidden in the final product.
When You Have Too Much Slack. Sometimes you’ll find there’s too much leather between a center tack and one corner. You may have difficulty getting the leather to lie smoothly without visible wrinkles. This often happens at the back corners of angled seats, because the corner angles are greater than 90 degrees. When this happens, simply remove some of the staples and try again. I typically remove staples from the trouble corner, back to the center tack. Remove the center tack too, if you feel it will give you a better approach to the corner. We know there’s simply too much material between point A and point B, so how do we manage the slack? The answer is micro-pleats.
-
- Problem Corners. Here we have too much material in the corner, and cannot round the corner without visible wrinkles. So, we must remove some staples and try a different approach.
-
- Micro-Pleats. Stretch the leather again and direct it away from the corner. This creates micro-pleats under the seat. Add a staple at each new pleat, and continue working toward the corner in this fashion.
-
- Good on the Second Attempt. If you start far enough from the corner, you can manage the extra leather. The result is an acceptable corner treatment.
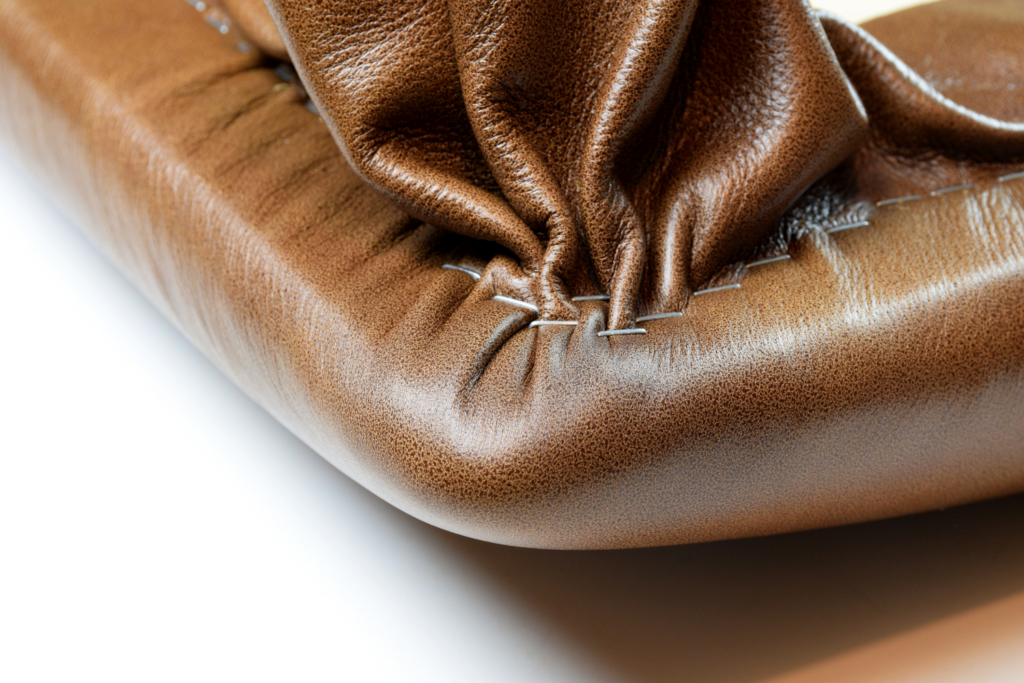
-
- Smooth Finished Corner. Once you have four corners that finish without visible wrinkles, you can move on to the next step. Add a dust cover to finish off the cushion before installing it on the chair.

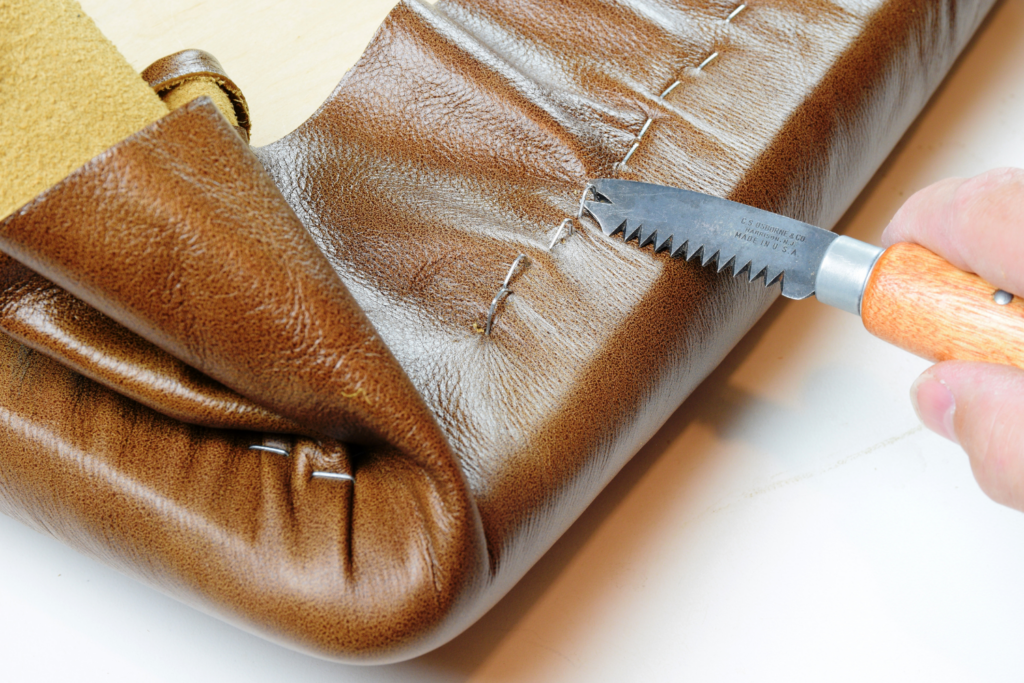
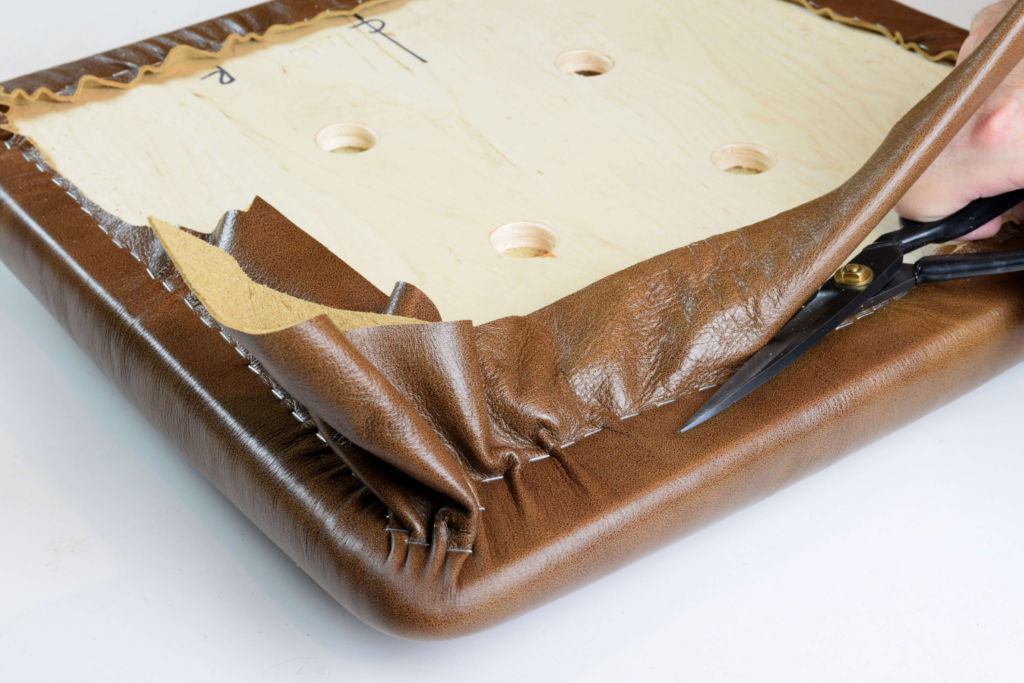
Remove Excess Leather, and Add a Dust Cover. Trim the leather underneath the cushion to remove unwanted bulk. It’s okay to trim right up to the staples. Finally, add a non-woven dust cambric to tidy up the cushion for a professional appearance. If your fabric store doesn’t sell cambric, there’s an easy alternative to be found at any local hardware store. Landscaping weed barrier fabric is a thin non-woven material that makes a perfect dust cover. It’s usually black or dark brown in color, which is great for household furniture applications.
-
- Trim the Excess. The extra length was useful for installing the cover, but now it’s just bulk that’s in the way. Trim the extra leather right down to the staples.
-
- Bigger Ammo. So far, we’ve been using 3/8” long staples. You may want to switch to ½” long staples to flatten any bulk that remains at the corners.
-
- Add a Few Long Staples at the Corners. Flatten any leather folds that remain at the corner. The flatter you can get this material, the better.

-
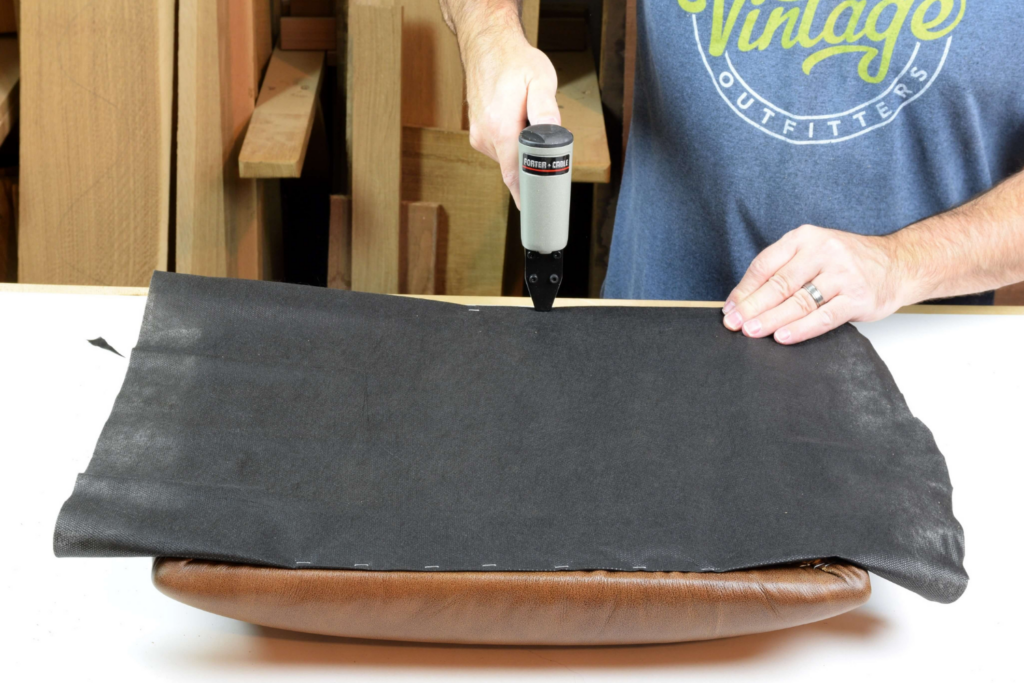
- Add the Dust Cover. Use a non-woven dust cambric, or landscaping “Weed Fabric” to finish off the underside of the cushion. Fold the edges under, and start at the front. Then lightly stretch it toward the back, and staple along the rear of the cushion.
-
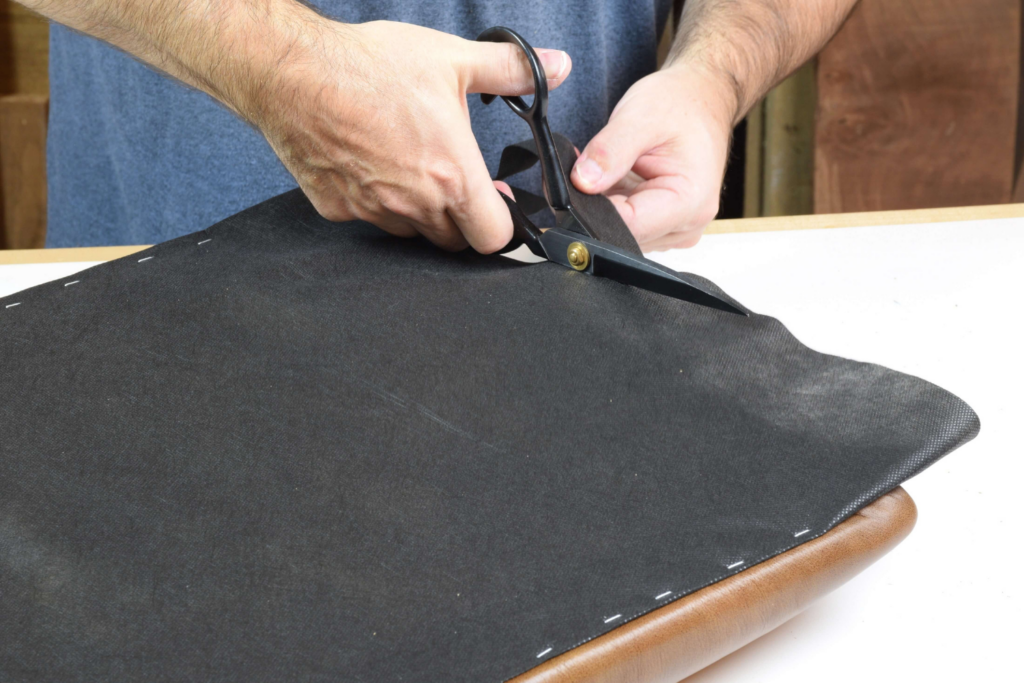
- Re-Trim the Sides. If the sides of the dust cover are too long, take a second to trim them down to a manageable length.
-
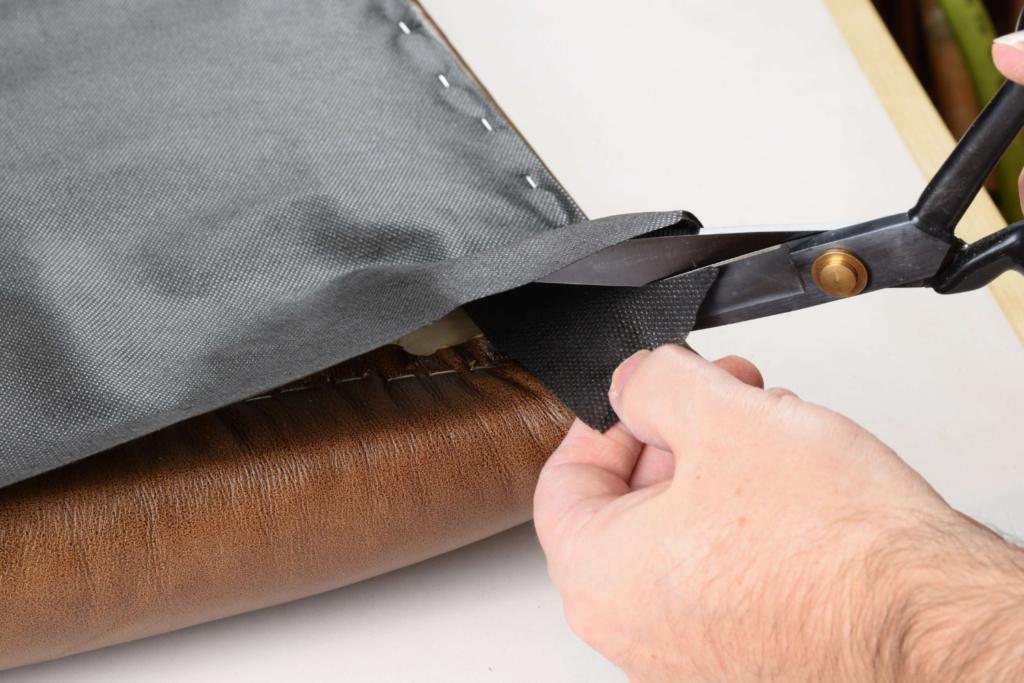
- Trim the Corners. Before folding the sides under, trim the corner of the dust cover. This just keeps the corners from sticking out, once you fold and staple the sides.
-
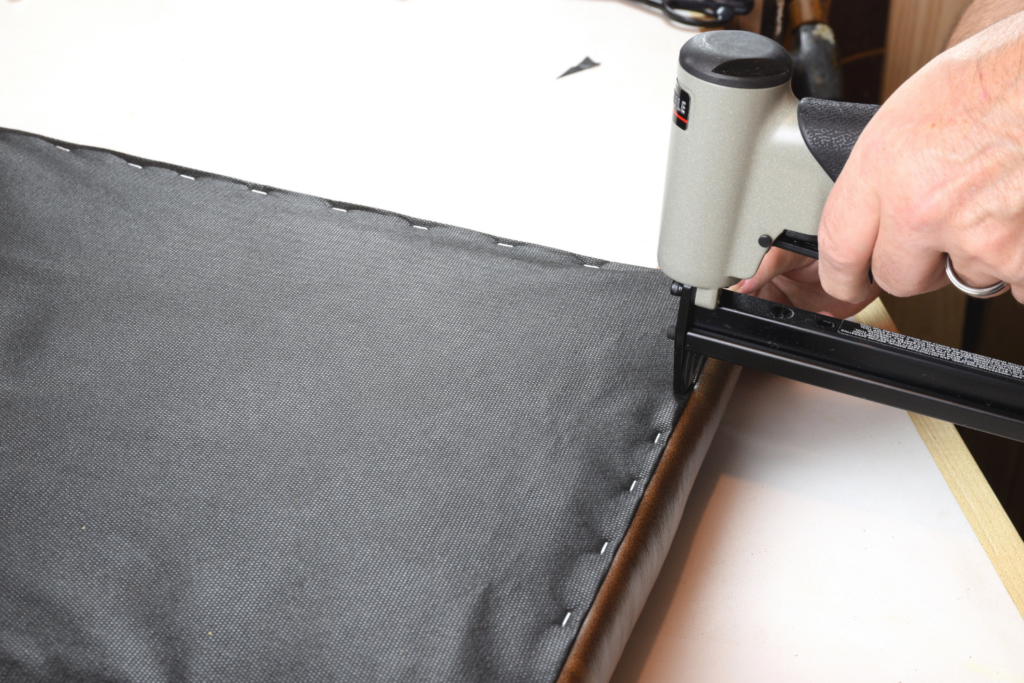
- Fold the Sides Under. Finish the dust cover by folding the sides under, and continue stapling it in place.
-
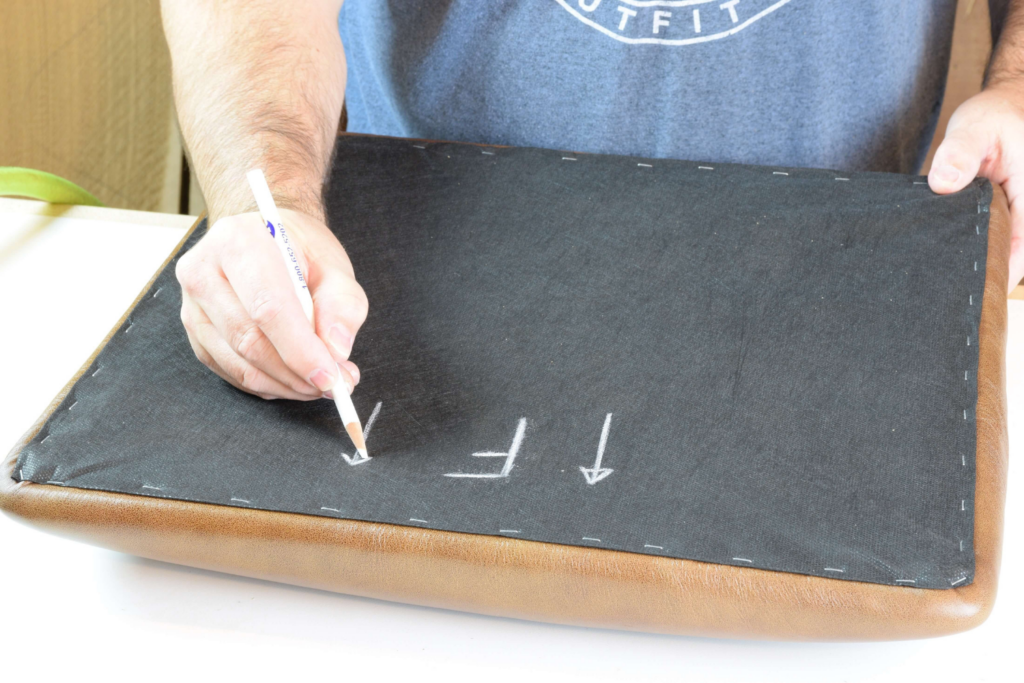
- Mark the Front. To make installation a little easier, mark the front of the chair with a grease pencil or chalk.
Inspired to give your own dining room chairs a DIY makeover? Depending on the size of your dining room chairs, and the number of chairs, our Leather Remnants can be a great choice. Be sure to consult our Reupholstery Guide to determine how much leather you will need- and don't forget to order samples before you choose your leather!