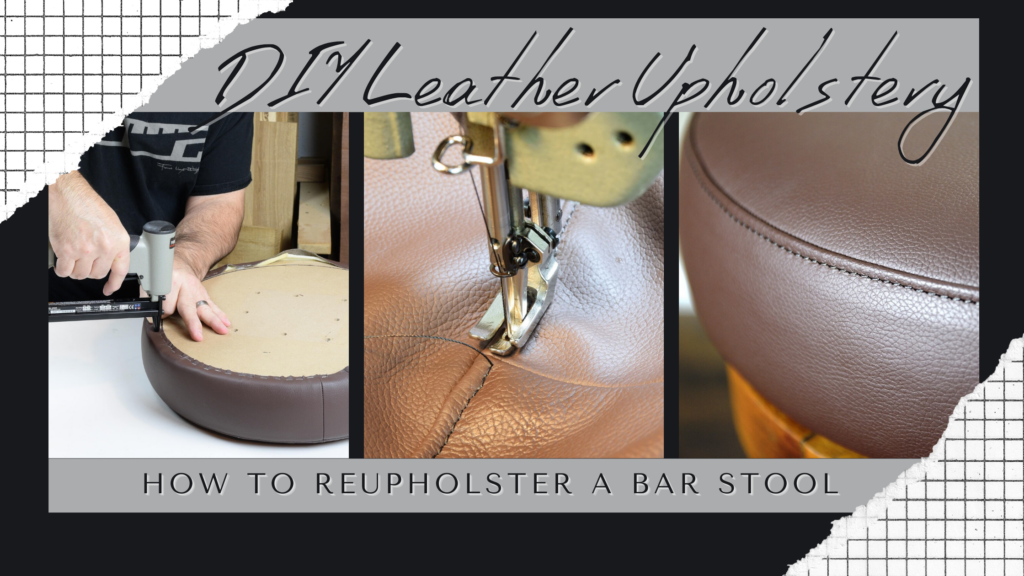
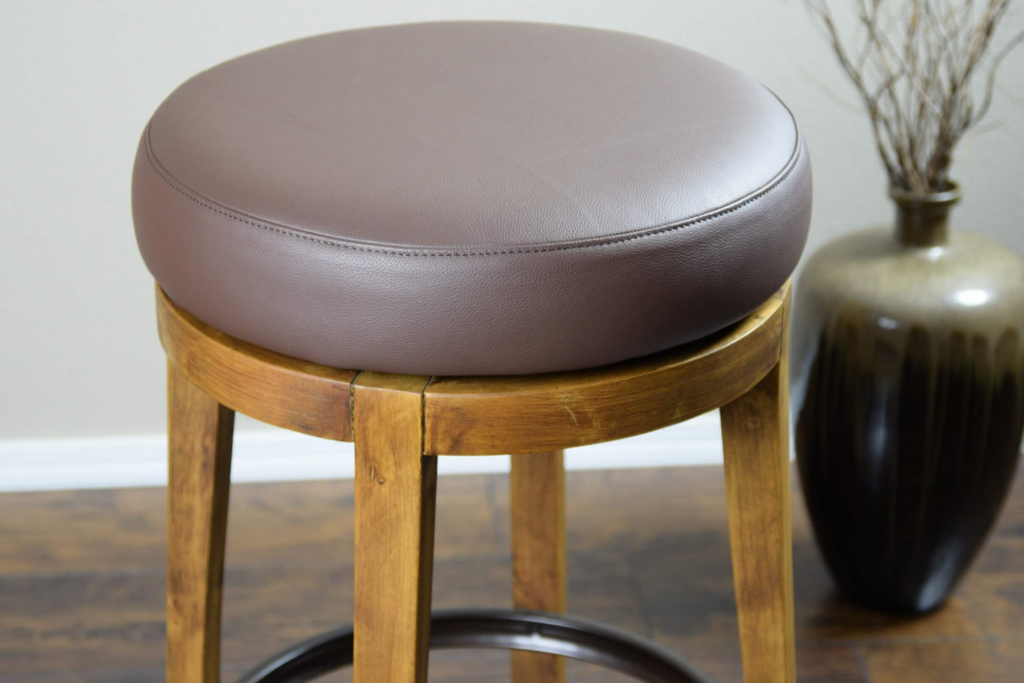
How many times have you wished the stools at your kitchen island looked a little nicer? Maybe they could be a little more plush or a little more inviting. If the old fabric or vinyl needs to be refreshed, consider leather upholstery for a tasteful upgrade to the look and feel of your home.
The small size of this project makes it pretty manageable, and since you only need two leather panels for each stool, a leather remnant just might do the job. If you have several stools to re-cover, consider getting a full hide. There’s just something about working with real leather that’s so satisfying. In fact, I actually find leather easier to work with than synthetic vinyl.
How Thick is the Cushion? The first question we need to ask is what’s the combined thickness of the seat base and foam? If it’s 2” or less, you may be able to stretch the cover in place with a “No-Sew” technique. Check out the Leather Hide Store blog on dining chair re-upholstery for that technique. Today, we’re working with a thicker cushion so a sewn technique will work better. We should also decide what type of seams make the most sense for this application. I chose a “single felled” seam with a visible topstitch for this barstool. Single felled or “flat felled” seams offer extra strength compared to blind seams, and help to manage bulk when sewing with leather. The short vertical seam in the boxing will be a simple blind seam.
-
-
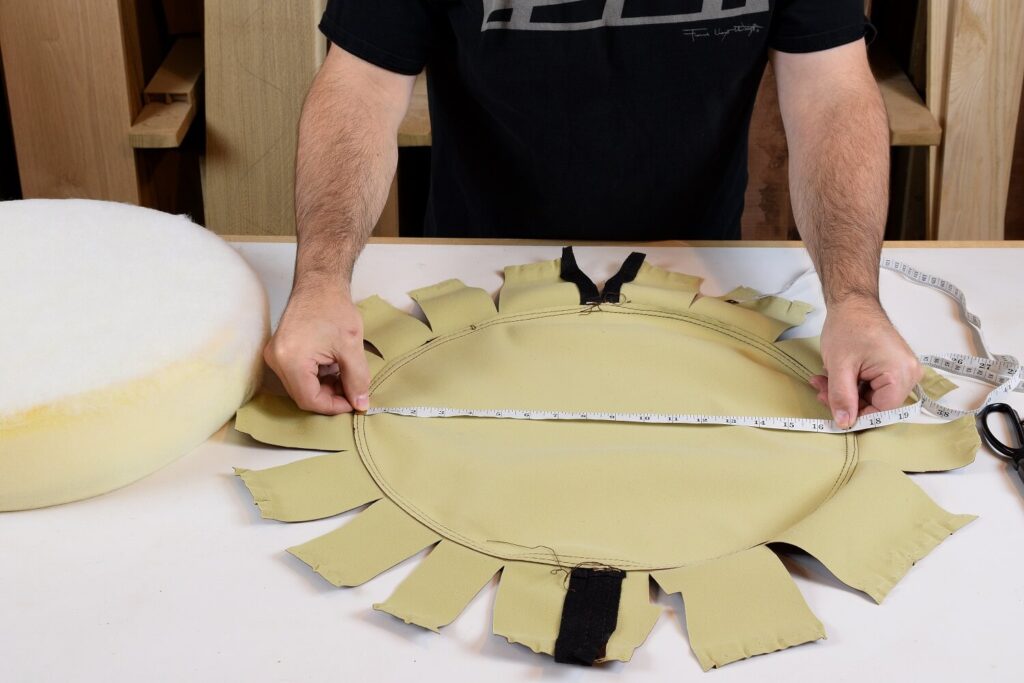
Pattern the Top Panel. Use the old upholstery to measure for the new parts. Slit the boxing to let the material lie flat as you take the measurement. The measurement here was 147-1/8″ which includes seam allowance.
-
-
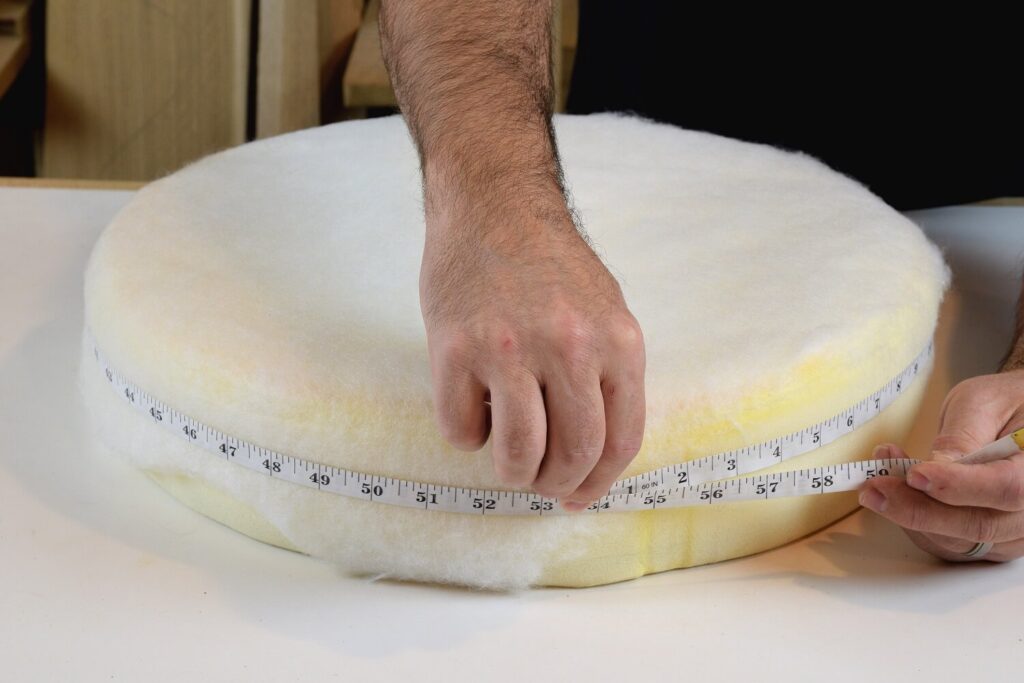
Measure or Calculate the Circumference. Figure a length for the boxing strip, and leave a few inches extra for now. Or, if you prefer, you can establish circumference with the simple formula Circ.=3.14 x D
Cutting the Leather. Now that you have sizes for the round top panel and boxing strip, lay out the leather suede-side up. It’s important to accurately cut the circle of leather, so the finished product will look uniform. To that end, I take the time to make a “beam compass” to draw the circle. The pattern tells me the original cover was 17-1/8” diameter, and this number already takes into account two ½” seam allowances. However, if you’re switching from cloth or vinyl to leather upholstery, I recommend subtracting a factor for leather stretch. I generally subtract ¼” for every 10” of panel size. Since the top panel is between 10” and 20”, I subtracted 3/8” for leather stretch. This gave me a top panel diameter of 16-3/4.”
-
-
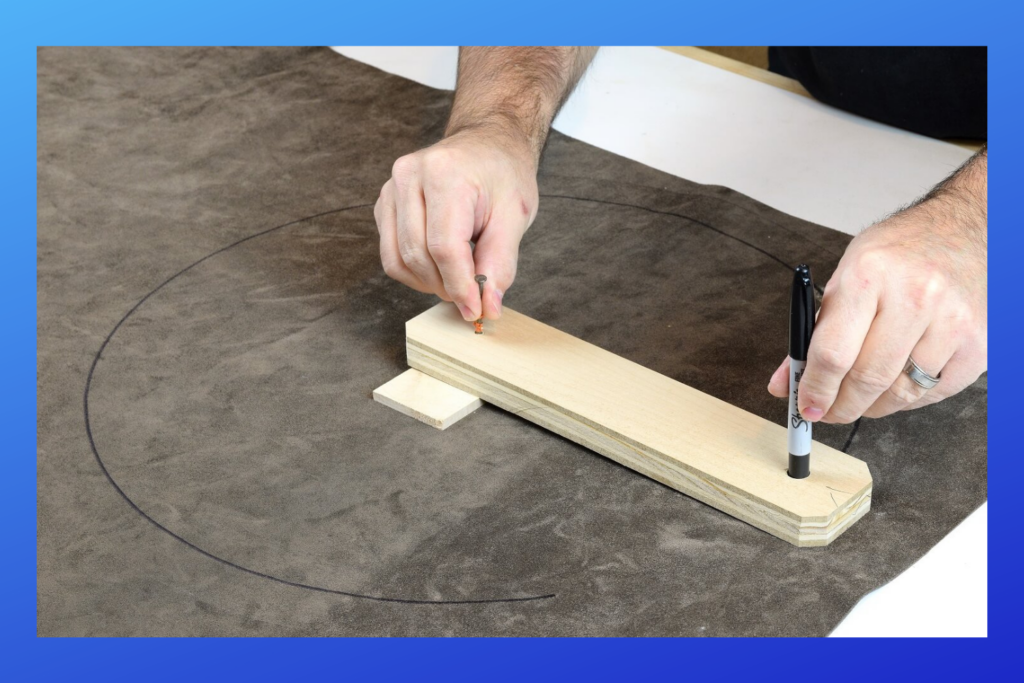
Beam Compass for Drawing Circles. Cut a scrap of wood and drill a 7/16” hole, centered 8-3/8” from a nail hole. A thin block of wood is temporarily held to the leather with double-sided carpet tape. Gently tap the nail in place, and draw a circle with a Sharpie marker.
-

-
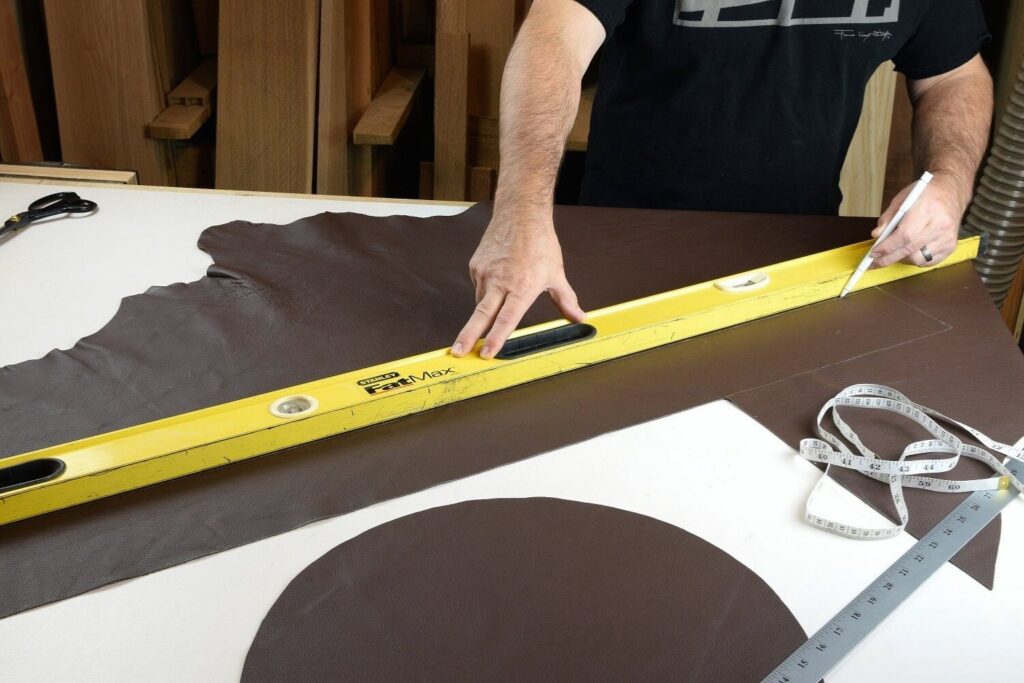
Long Boxing Strip. Now flip the leather over and mark out the boxing strip with a special leather marking pen and long straightedge. The boxing strip is 4-3/4” wide x 55” long in this case.
-
-
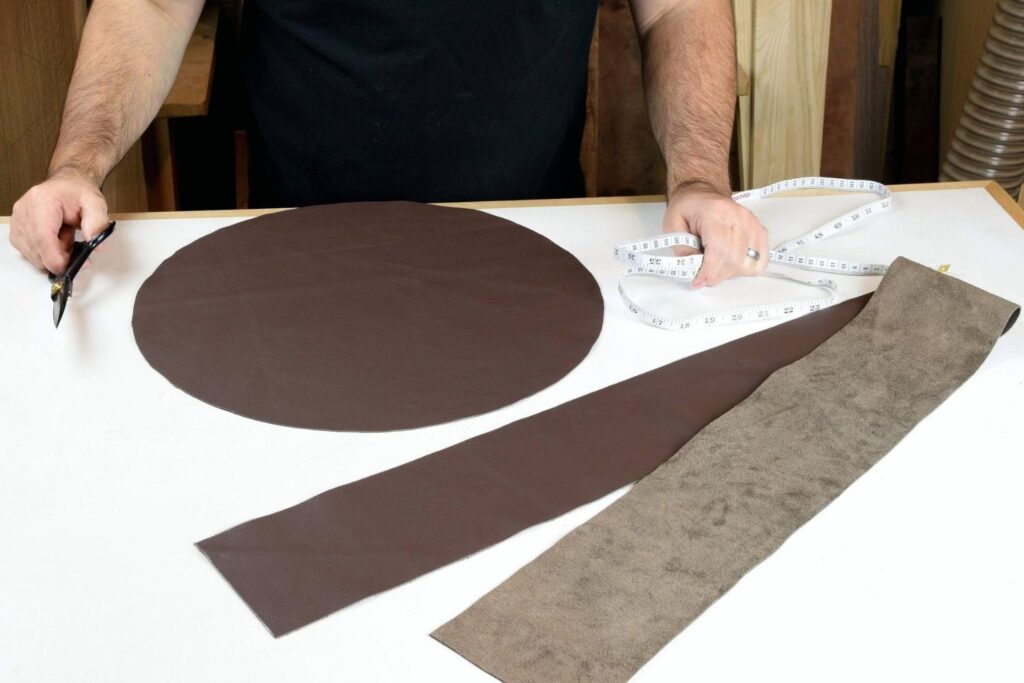
Two Parts…That’s It! With no piping to contend with, this simple stool project has a short cut list, with only two parks to make.
Form-Fitting Cover Eliminates Wrinkles. Most leather upholstery projects involve wrestling the cover in place to manage excess material. This invariably results in unwanted and unsightly wrinkles. To avoid the problem from the start, we’ll make a sewn cushion cover.
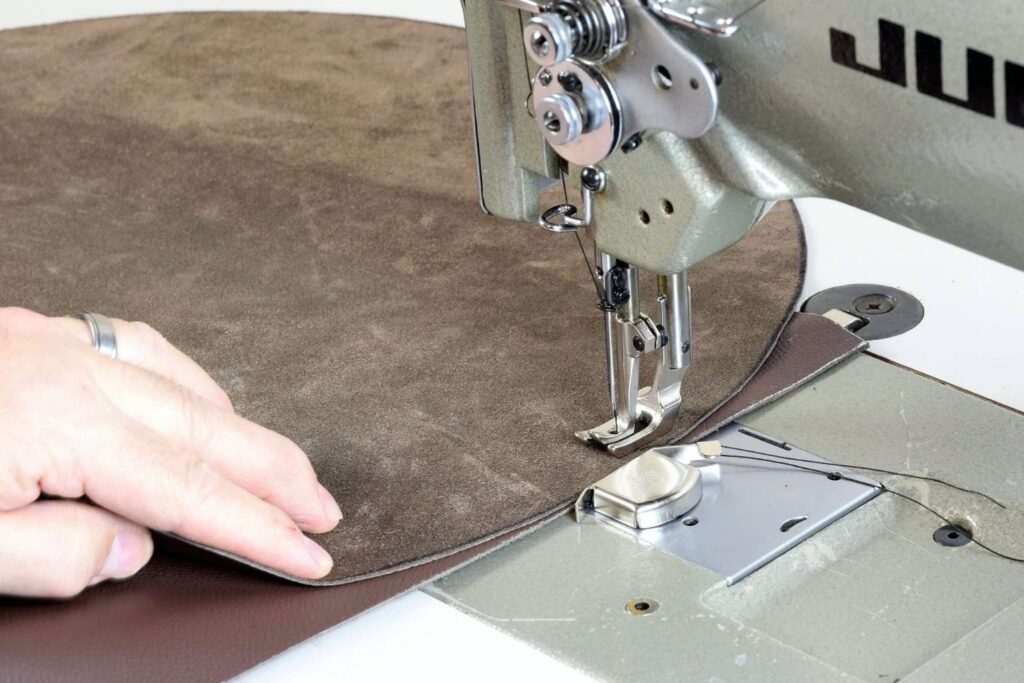
Start by sewing the round panel to the boxing strip with a simple blind seam. I use a ½” seam allowance and a magnetic guide on the sewing machine. Make sure your machine is up to the task by testing on some leather scraps.
-
-
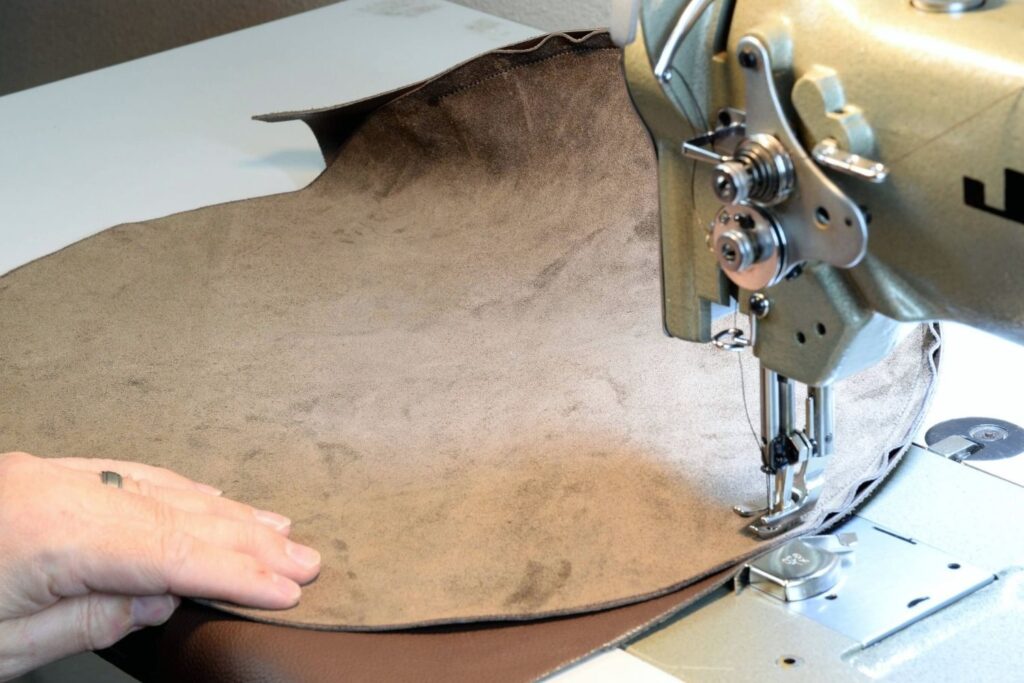
Start with a Simple Blind Seam. Position the round top panel over the boxing strip to sew the main seam. Start a few inches from the end of the boxing, and carefully align the edges as you go.
-
-
Steer the Bus. Rotate the round top plate to keep the edges aligned as you sew. Meanwhile, the long boxing strip is being pulled straight through the machine by the walking foot.
-
-
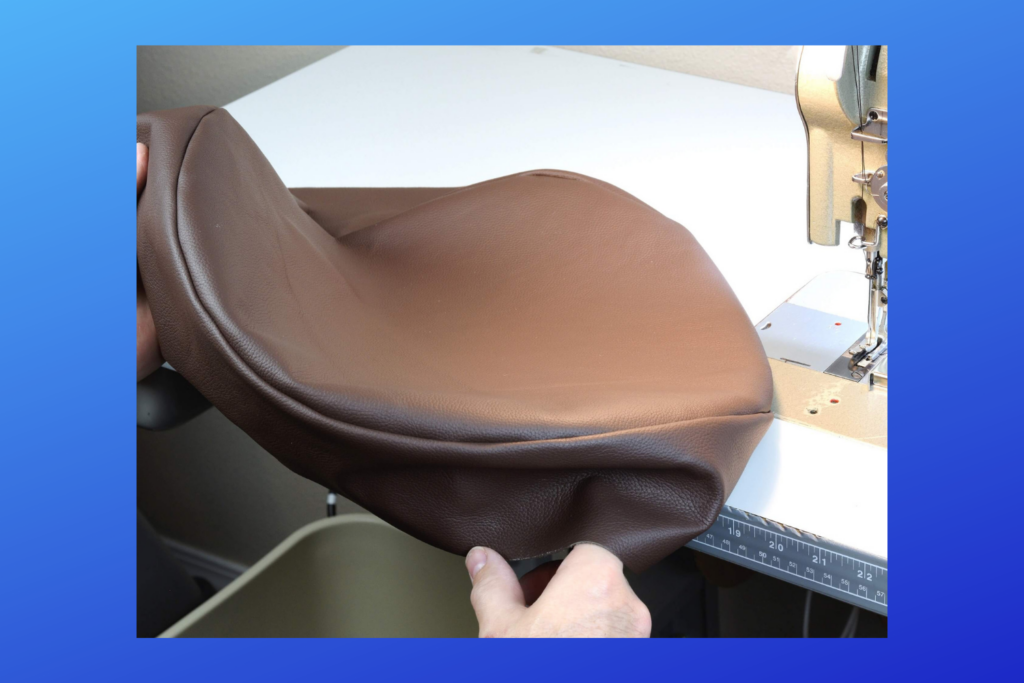
Starting to Take Shape. With most of the blind seam complete, the leather is beginning to look like a cushion.
-
-
Leave Boxing Open. When finishing the blind seam, stop a few inches from where you started. Remember to back-tack when starting and stopping to lock in the stitch.

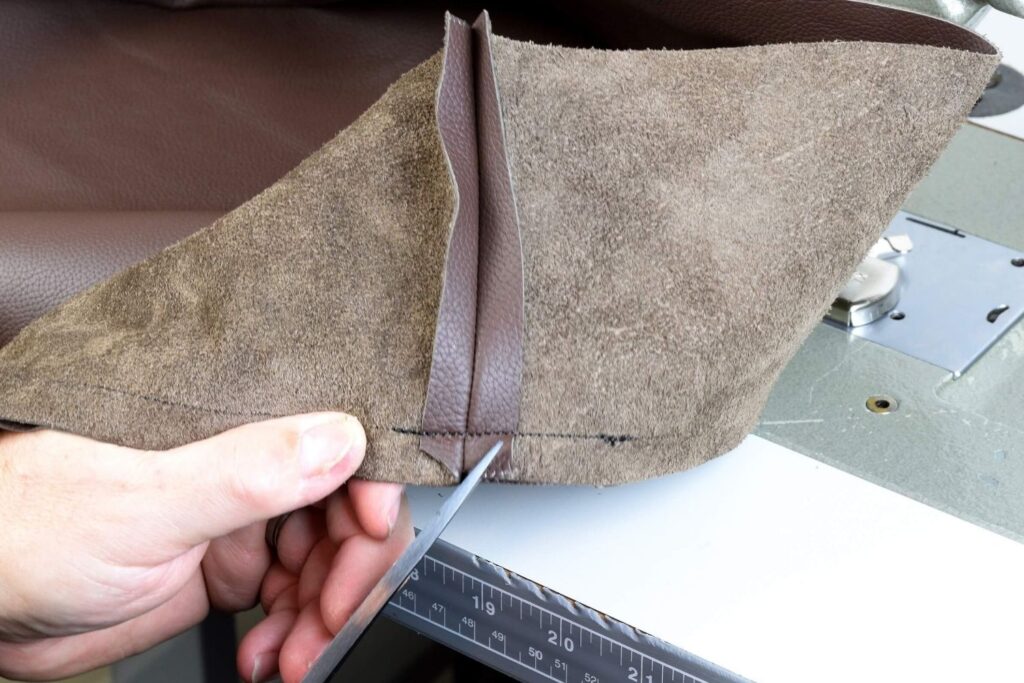
Terminating the Boxing. Cut a small notch in the top panel to indicate where the seam in the boxing will land. Then transfer that location to the boxing, and mark a line ½” beyond for your cut line. Once you’ve marked both ends of the boxing, go ahead and trim the ends to the final length. Then it’s just a matter of running a short blind stitch to close the boxing. Finally, open up the seam allowance and complete the main perimeter seam to close the back of the cushion.
-
-
Trim the Boxing. Mark a cutline ½” beyond the intended seam location, and trim the boxing to the final length.

-
-
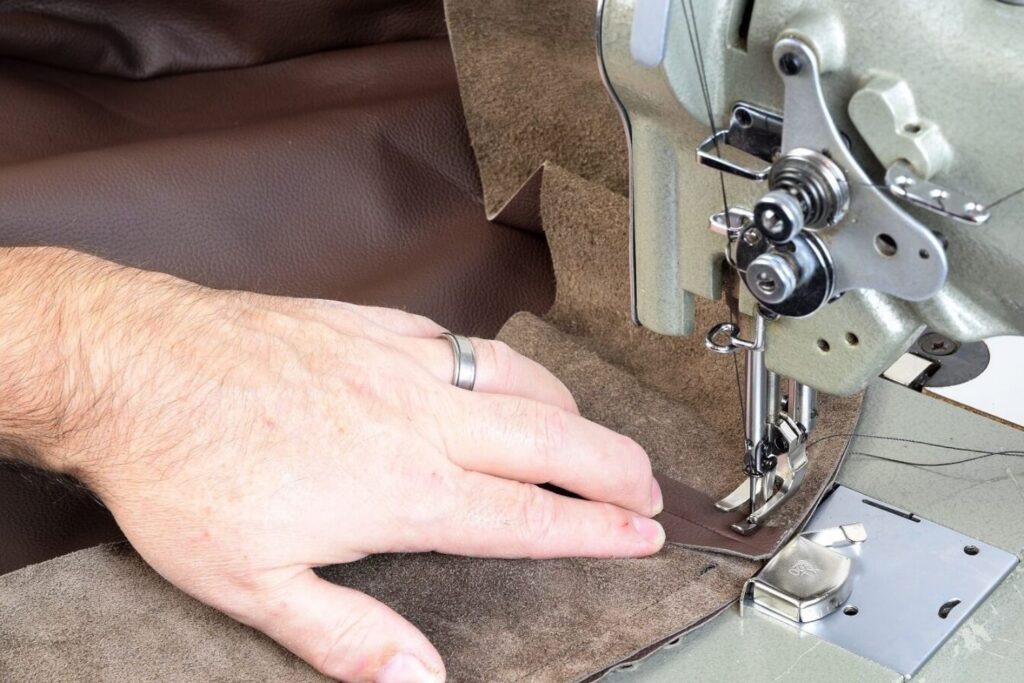
Sew the Boxing Closed. Again with a ½” seam allowance, connect the two loose boxing ends. For blind seams in leather, I like to set the machine for about 8-10 stitches per inch.
-
-
Fold the Seam Allowance Open. To minimize bulk, lay the seam open in preparation for the next step.

-
-
Finish the Main Perimeter Seam. Line the needle up with your previous stitch line, and close the seam. Walk right over the boxing seam, and finish up with some back-tacking.

Prepare to Topstitch. All that’s left at the sewing machine is a topstitch around the perimeter of the cushion. Often, I’ll swap the sewing machine foot to a zipper foot or special topstitching foot, but in this case I kept the ¼” cording foot installed. Increase the stitch length to about 5-6 stitches per inch for a more decorative look.
Lightly stretch the seam open as you sew the topstitch. The goal is to lay the stitching about ¼” from the seam and sew the double seam allowance to the boxing side. This will yield the cleanest look once the cover is installed on the cushion base.
-
-
Trim Away the Excess. Anticipate any bulk in the topstitch, and trim it away beforehand.
-
-
Topstitch the Perimeter. Maintain a consistent distance from the seam, as you stitch around the cover. 5-6 SPI looks best here.

-
-
Terminate the Topstitch. As you make your way full-circle, try to land in the same holes. Stitch over two of your previous stitches, and leave the threads extra-long as you cut the cover free from the machine. With a hand sewing needle, pass the threads to the back-side of the cover, and tie them off.

-
-
Start Inside-Out. Place the sewn cover over the cushion, and center the top panel over the foam.

Install the Cover. The only work that remains is affixing the cover to the cushion base. If your measurements were accurate, and your cuts true… the rest should be a piece of cake. Draw a reference line ¾” from the edge of the wood, which will help keep the cover centered on the foam base. Flip the cover down over the foam, keeping it roughly centered as you work. Start with four cardinal staples to anchor the cover in place. Then add one staple midway between two cardinal fasteners. Next work opposite that spot, to keep things even. Repeat this process of adding a staple on the near side of the cushion, followed by the far side.
-
-
Stretch the Cover in Place. It may feel like the cover is too tight to fit over the cushion. Remember, it’s better to have the cover a little snug to prevent wrinkles.

-
-
Cardinal Directions. Set four staples, pulling the cover to your reference line. The line is ¾” in from the edge of the wood in this case. Start at one side, then set your next staple on the opposite side.

-
-
Split the Difference. Set another staple between the cardinal staples, and proceed to the opposite side. Four staples become 8. Split the difference again, and add more staples, always starting on the near side, and working towards the far side. Pretty soon, you can fill in all the staples required.

-
-
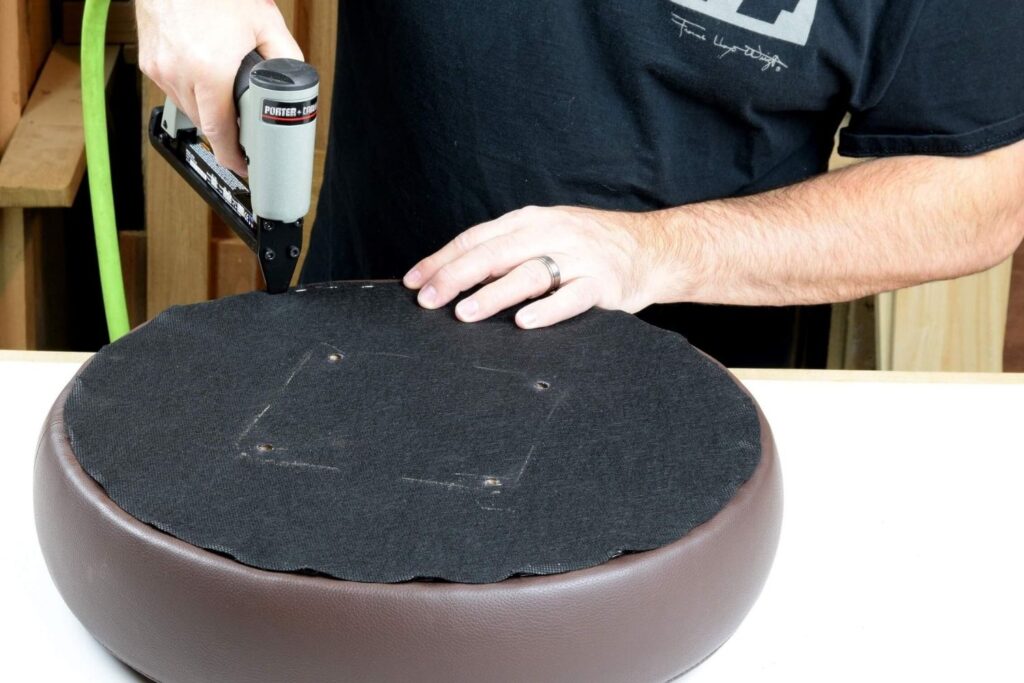
Add Cambric Dust Cover. Finish your project by adding a cambric dust cover underneath. Make sure the wood has vent holes to allow air to escape. Poke some holes in the dust cover, and align them with the bolt holes as you staple the cover in place. Now your barstool cushion is good as new, and ready to enjoy for years to come!


Featuring Maui Coffee from the Urban Collection
"A little more persistence, a little more effort, and what seemed hopeless failure may turn to glorious success.” ~ Elbert Hubbard